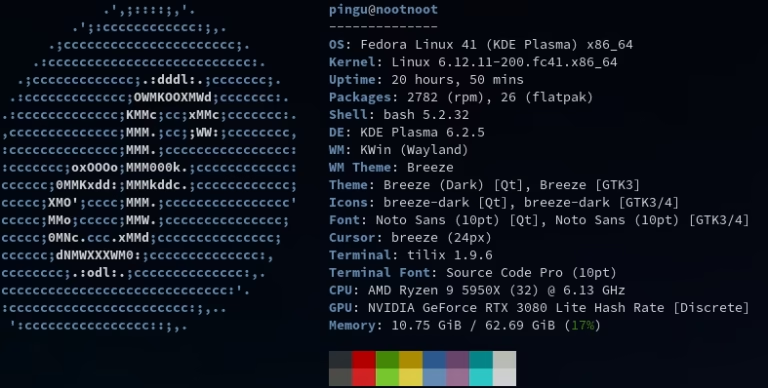
If you’ve ever bounced between different Linux distros like I have (I’ve even been lured back into the Windows world temporarily before returning to Linux, this time with CachyOS), then you probably know the power and flexibility that Docker brings to the table. Here’s my journey with setting up Docker on CachyOS – a fresh Arch-based distro that’s got me hooked.
Installing Docker
After the initial excitement of exploring CachyOS wore off, the first thing I did was install Docker. Coming from years of using Fedora and dabbling in Debian, I was eager to get back into the Arch-based ecosystem. While CachyOS includes Docker in its official repositories, I quickly found that the version was outdated. So, I decided to go with the latest release directly from Docker’s official documentation.
Yes, it means updates won’t be managed by the package manager, but I’d rather deal with manual updates than run an older version of Docker.
If you are following this as a guide, remember to change the version in the wget command to match the latest release. I’d recommend following the official documentation, as this is not meant to be a how-to guide.
Here’s how I installed it:
- Download the latest docker binary release:
wget https://download.docker.com/linux/static/stable/x86_64/docker-27.5.0.tgz -qO- | tar xvfz - docker/docker --strip-components=1
mv ./docker /usr/local/bin
- Verify Docker’s working
sudo docker info
- Run a quick test
docker run -it --rm archlinux bash -c "echo hello world"
Simple, right? Well, almost. I ran into a little hiccup where my VPN conflicted with Docker’s bridge network, so I had to disable it temporarily. If you want to keep your VPN running, check out some solutions here or here.
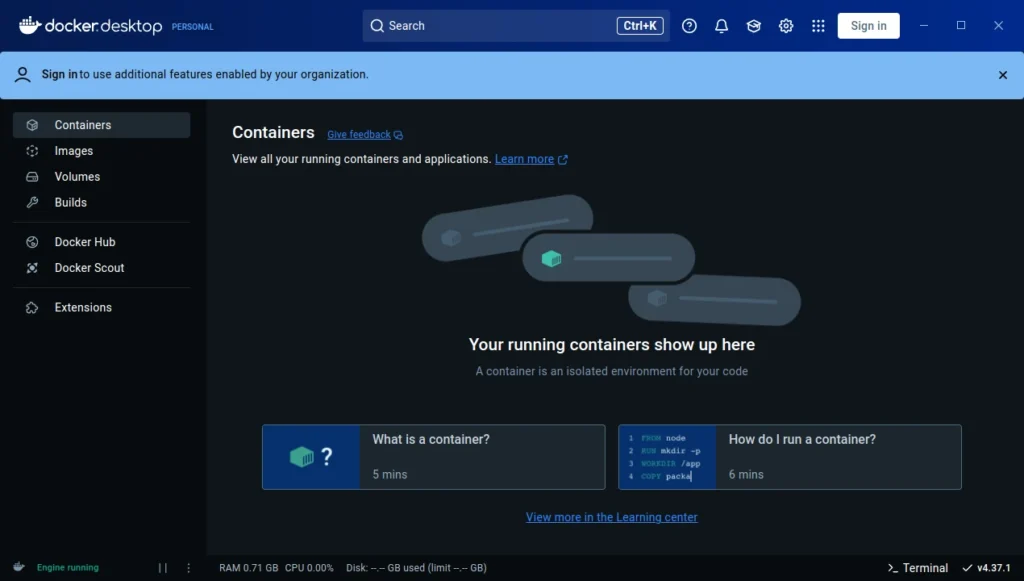
Installing Docker Desktop
Normally, I would use apt or dnf to install Docker Compose, but the Docker docs suggested using Docker Desktop on Arch. I figured it could be useful to have the UI for managing updates (even though I don’t plan on using it much).
I grabbed the latest Docker Desktop package for Arch and tried to install it using pacman:
sudo pacman -U ./docker-desktop-x86_64.pkg.tar.zstUnfortunately, I hit a snag:
error: could not get current working directory
error: could not open file ./docker-desktop-x86_64.pkg.tar.zst: No such file or directory
error: could not commit transaction
error: failed to commit transaction (transaction aborted)
Ahhh, the joys of linux. How I missed thee. Rerunning the command again resulted in this error:
error: could not open file /var/lib/pacman/local/docker-desktop-4.37.1-178610/desc: No such file or directory
warning: could not fully load metadata for package docker-desktop-4.37.1-178610
error: failed to prepare transaction (invalid or corrupted package)
Troubleshooting
After a little google-fu it seemed other users had bypassed this issue by using placeholders for missing files. Okay, let’s try that…
sudo touch /var/lib/pacman/local/docker-desktop-4.37.1-178610/desc
sudo touch /var/lib/pacman/local/docker-desktop-4.37.1-178610/files
Aaaaaaand no dice…. I was still getting the “could not get current working directory” error. I had less luck googling why pacman was throwing that error when trying to install a local package. But I figured well if it can’t get the current working directory from ./docker-desktop-x86_64.pkg.tar.zst, maybe if I pass the absolute path it can find it?
BINGO!
typing out the full path from the root directory worked like a charm. Still no idea why pacman refused to find the package in the current working directory. If you have any ideas, please sound off in the comments or get in contact! It was definitely there when I checked the files with ls. Ah well, we got there in the end. Now Docker Compose is up and running, along with a bunch of other tools that may come in handy (or not, depending on what I get up to).
Adding User to Docker Group
To avoid having to use sudo every time you run Docker commands, the final step is to add your user to the Docker group as shown in the user permissions post:
usermod -aG docker usernameJust replace username with your actual username, and you’ll be all set.
Next Steps
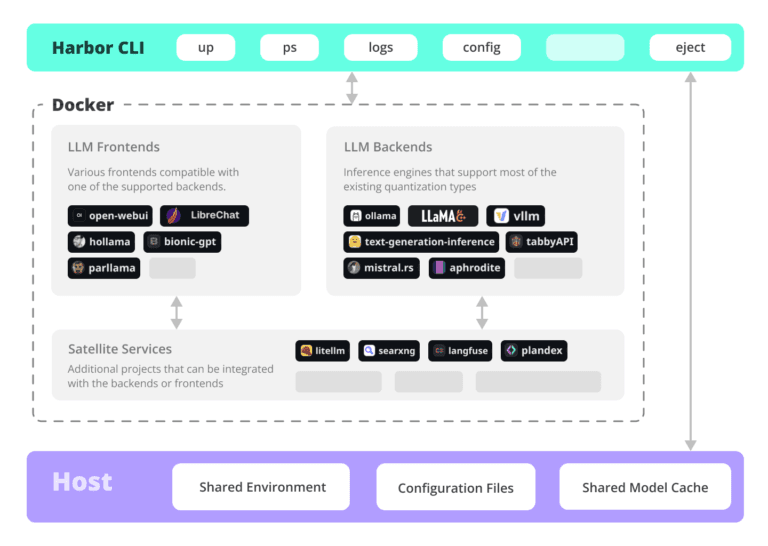
With all the buzz about DeepSeek, I’m planning to dive into LLMs next by installing Ollama and OpenWebUI. Stay tuned for progress updates, and feel free to drop any suggestions, corrections, or questions in the comments!