My Homelab Journey
I built my first homelab out of spare parts left over after upgrading my main PC. It was nothing special at the time. A modest system with an i5, 8GB of RAM, and a few mechanical drives I had laying around. I used to slap random distros on it and use VNC to remote in and play around. That setup served me well for many years.
Venturing into Virtualization
Over time I developed an interest in virtual machines, networking and containerization. Not only is it good security practice to isolate services from each other, but it’s also convenient to be able to take periodic snapshots of a machine in case something breaks.
Discovering Proxmox
After distro hopping far too much, I got more and more comfortable with the power and flexibility that Linux provides. KVM/Libvirt were my hypervisor of choice with Docker for containerised images. After watching a video about Proxmox by NetworkChuck one day I decided to give it a shot. I liked the idea of having a built-in web interface to manage everything without having rely on VNC/SSH. All in all it was a solid product, but as my homelab grew, my requirements changed.
The Chia Cryptocurrency Experiment
Around 2021 I was working at a local electronics retailer when I discovered a new cryptocurrency doing the rounds that caught my attention. Chia. A blockchain technology that used a “proof of space and time” consensus protocol to “farm” tokens. As I was able to access mass storage relatively cheap, I decided to give it a shot. I bought 5 x 10TB HDDs and a 2TB NVMe drive and started my plot.
Dealing with the Downturn
Once Chia hit the market it peaked at around $1,500 a few days in. Nice! Or so I thought… As is often the case with niche coins, it didn’t take long for the value to plummet. The downward trend continued and I foolishly held on to what was in my wallet. So now I had roughly 50TB worth of storage sitting there doing nothing.
From Cryptocurrency to NAS
Well, not for long. I had always wanted a NAS, so I went about wiping the drives and looking in to the best way to set them up for features, performance, and redundancy. While RAID is great if you want performance and redundancy, RAID Z offers snapshotting, compression, expansion and a tonne of other neat features. Only downside was ZFS is heavily dependent on memory. So I slapped in an extra 32GB of DDR4 and went about searching for an OS to use.
TrueNAS to the Rescue
At the time, ZFS wasn’t officially supported by Proxmox. While there were workarounds, I decided to look for an alternative. Along came TrueNAS. The TrueNAS UI made setting up the ZFS pool a breeze and retained web-based or direct CLI to make any modifications I needed. I started off on TrueNAS Core, a FreeBSD based OS which used Jails for containers, but ended up migrating to TrueNAS Scale for the additional features and familiarity with Linux.
The Hardware Struggle
As the complexity of my setup grew, the hardware started showing its age. There are only so many services you can host with an old 4 core single threaded i5 and integrated graphics. One day when swapping out the cooler to use in another build I forgot there was no retention bracket and tragedy struck….
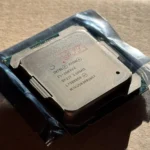
The CPU Disaster

The CPU absolutely mangled the pins in the socket as it was removed. I took it to a friend with steadier hands than me to see if he could straighten them out, but no luck. It just power cycled and refused to post. Luckily he was kind enough to loan me a spare X79 board, CPU and RAM that I could use in the meantime until I got hold of new parts. So off I went on the hunt for an upgrade!
Upgrading My Homelab
I sat down and considered my options. I could go with a used rack mount server, but that would require purchasing a rack, and most used servers are sold as is and missing things like rails, caddies, or even essential components. My space is also limited, especially now that the spare room belongs to my future daughter. So whatever I went for had to fit in an already cramped study with 2 other computers.
Building the New Beast
Taking this in to consideration ruled out most rack mount servers as they tend to be quite loud when stock. I already had a massive Thermaltake W100 for a future build sitting around doing nothing, so I decided to grab a used X99 workstation board, pair it with a Xeon CPU and 128GB of DDR4 Registered ECC Memory and put the case to use.
A Temporary Solution
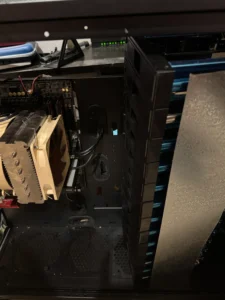
I set up the loaner X79 in the Thermaltake case while waiting for delivery. The case was MASSIVE! Pictures don’t accurately represent the scale of this case.

Overall I was happy enough with the features the case provided. It was spacious and provided ample room for cable management (not that I took advantage of that for this temporary setup).
The Makeshift Backplane
There was just one issue I had with it. Without mounting the HDD bays to the front of the case, accessing the rear of the drives was a royal PITA. That needed to be fixed. Ideally I would have liked a SATA or SAS backplane, but I found a workaround.
Enter the Orico ORICO-1106SS!
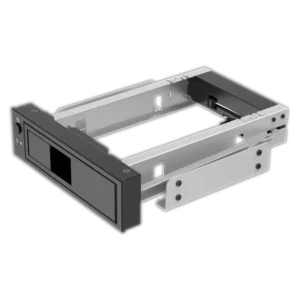
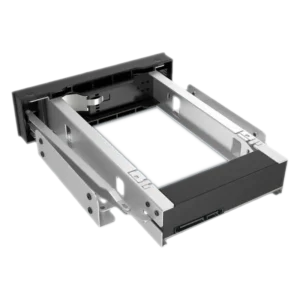
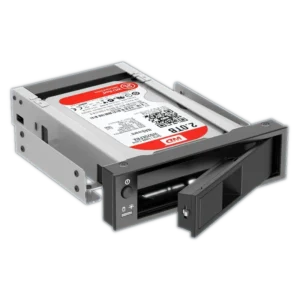


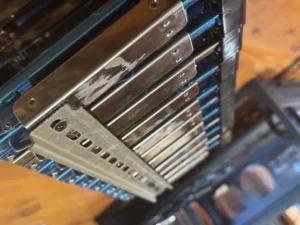
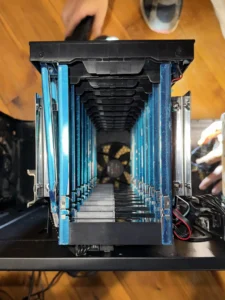
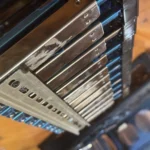
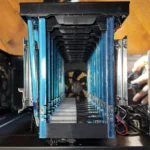
A product designed to convert a 5.25″ optical bay in to a 3.5″ hot swap bay. I figured I could slap together a makeshift backplane with a bunch of these. While waiting for my parts to arrive I decided to MacGyver together a dodgy backplane out of badly cut tin and double sided tape. The results were… Well… See for yourself.

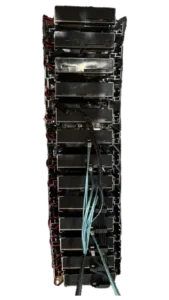
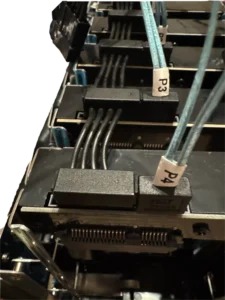


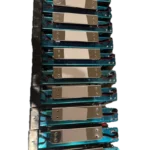
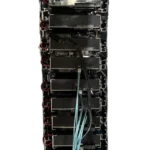
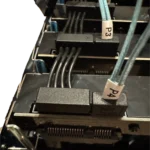
As you can see it’s a flimsy quick hack together job and considering it was only meant to be a temporary solution, I figured it would do for now. Oh how wrong I was…
Disaster Strikes! A Red Hot Summer
Australian summers are known for their unforgiving heatwaves and this summer was no exception. A combination of heat and weight from the drives ultimately ended in disaster. I was sitting at my PC one night when I heard a bang then an awful grinding noise. The makeshift JBOD had collapsed under it’s own weight and was sitting against the spinning fans of the case. I quickly shut the server down and set it aside. I contacted my friend I borrowed the X79 from to see if he had any spare parts to throw together a sturdier build over the weekend.
Rebuilding the Beast
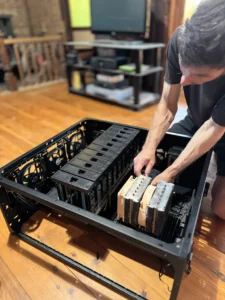
After a few days serverless, the weekend arrived and so had all my parts. It was time to get the ol’ server back up and running. I loaded up the car and headed to his place.
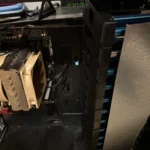
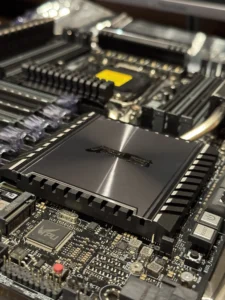
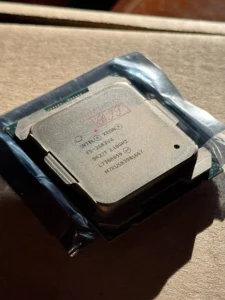
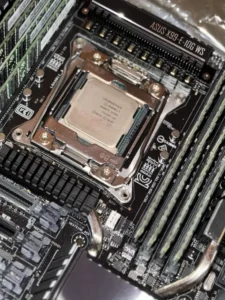
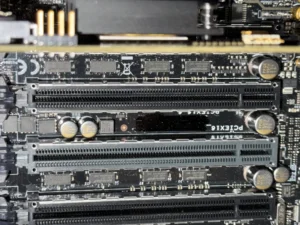
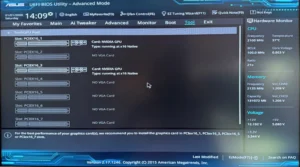
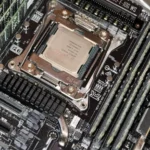
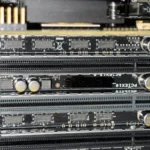
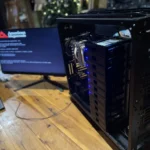
Scrounging through his scrap metal pile, we came across a few DIN Rails he had laying about. In the absence of a standardized chassis, they seemed like they would do the trick for supports. We tore down the X79 build and unboxed ASUS X99-E 10G WS that had just arrived. Gotta say, I got this thing for an absolute bargain. There were a few quirks, like all the serial numbers and ASUS logos being covered with black sharpie (see image gallery below), but considering these motherboards still sell for $1K+ on eBay, I can deal with a few blemishes for roughly $600 off the price.
The Final Build
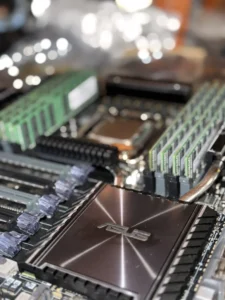
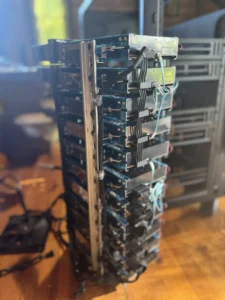
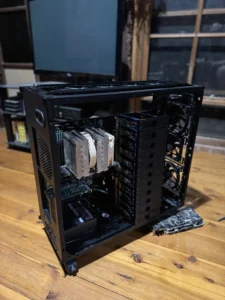
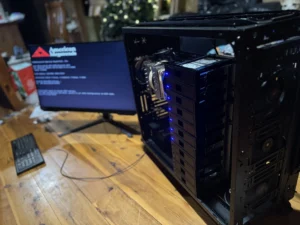
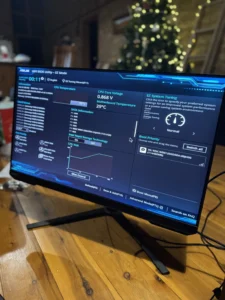


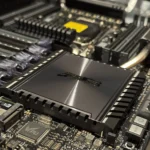
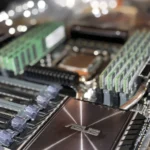
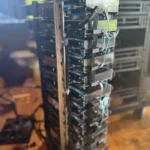
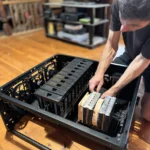
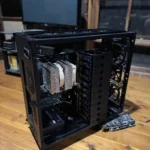
After a long day of building, the beast is finally back on its feet! I plan to add a 2nd bay at some point which will require switching out the DIN rails for something a little slimmer, but that’s a problem for another day. Overall I’m really happy with how this project came out and the performance on this thing has been rock solid.
Closing Remarks
The relentless promotion of cutting-edge technology by YouTubers and tech reviewers can often fuel a culture of FOMO, leading consumers to discard perfectly functional hardware in pursuit of the latest and greatest. This trend not only burdens wallets but also contributes significantly to the growing problem of e-waste, which poses a serious environmental challenge. However, it’s worth remembering that high-end computer hardware from as far back as a decade ago can still hold its own for most tasks today—and it’s available at a fraction of the cost. By resisting the pressure to upgrade unnecessarily and instead considering older, high-performance components, consumers can save money, reduce waste, and still enjoy a great computing experience. Thoughtful purchasing decisions can go a long way in balancing technological needs with environmental responsibility.
If you have an isolated space with suitable acoustic dampening and ventilation you could save yourself the hassle of building your own server by buying used. Keep in mind, these are often salvaged from production and may be missing components so please be sure to check with the seller if there is anything you will need!
If you are interested in the parts I used on my build, I have a list of components below.
Components
Disclaimer: This list contains affiliate links. If you make a purchase through these links, it won’t incur fees, but I will earn a small commission that helps support the site and its content.
| Part | Make/Model | Shop |
|---|---|---|
| Case | Thermaltake W100 | Amazon |
| Motherboard | ASUS X99-E 10G WS Motherboard | AliExpress |
| CPU | Xeon E5-2683 v4 | AliExpress |
| RAM | 8 x Used Samsung PC4-2133P REG ECC Server RAM (M393A2G40DB0-CPB) | Amazon eBay |
| Power Supply | Seasonic Prime 1300W Platinum | Amazon |
| HDD Bays | ORICO 5.25 Trayless Hot Swap Rack | mwave eBay |
| HBA SAS Card: | LSI 9211-8i in IT Mode + 2*SAS SFF-8087 to 4x SATA Cable | eBay AliExpress |
| GPU1 | Nvidia Quadro P4000 (8GB) | Amazon eBay |
| GPU2 | Nvidia GTX 970 (4GB) | eBay |
| Case Fans | TL-G12B PWM Fans x 8 | AliExpress |
| Fan Hub | Coolmoon 1 To 10 PWM & ARGB Magnetic Hub Splitter | Amazon eBay AliExpress |
| Cable Organizer | TOPK Velcro cable holder | AliExpress |
| Molex to SATA | 1 x Molex to 5 x SATA Power Splitter Cable | AliExpress |
| SATA to SATA | Lingable 1 to 5 x SATA Power Splitter Cable | AliExpress |